How To Do Gel X Nails at Home: Practical Steps & Pro Tips

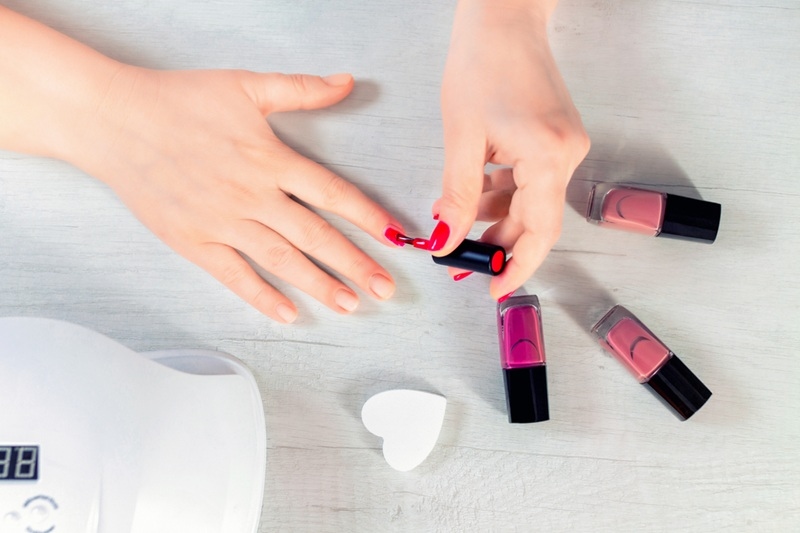
Gel X nails at home are becoming a practical option for people who want salon-style extensions without stepping outside. This method uses soft gel tips that cover the full nail and cure under a lamp for strength. The result looks clean and natural when done correctly.
This blog will help you understand how to apply Gel X nails step by step and the benefits of Gel X nail tutorial.
Must Read: Understanding Beauty Tech Revolution 2025 and its Impact
What is Gel X Nails at Home?
Gel X nails at home refer to a full-coverage nail extension system made from soft gel material. Instead of building the nail layer by layer, a pre-shaped gel tip is attached to the natural nail using gel adhesive. Once cured under a lamp, it becomes firm and secure.
It sounds technical at first. But it really is not. The tip is placed over the natural nail, pressed gently, and cured. That is the main idea.
The appeal lies in its simplicity. There is less dust compared to traditional hard extensions. The process feels lighter on the hands. Many users notice that their nails look more even because the tip already comes in a defined shape.
How to Apply Gel X Nails: Step-by-Step
Understanding how to apply Gel X nails properly helps avoid lifting and uneven surfaces. It is not difficult, but it does require attention. The steps below break the process into clear parts.
1. Prepare the Natural Nails Properly
Preparation begins with trimming the nails short and shaping them evenly. Push back the cuticles gently. Remove dry skin around the nail bed. Then buff the surface lightly to remove shine. This step may seem small, but it matters a lot. The adhesive sticks better to a slightly rough surface.
Clean the nail plate using a lint-free wipe. Make sure there is no oil or dust left. Skipping preparation often leads to lifting later. And once lifting begins, the extension will not last long.
2. Select and Size the Gel Tips Correctly
Each nail has a different width. Choose a gel tip that fits from one side of the nail to the other without pressing into the skin. If the tip feels tight, it will create pressure. If it feels loose, there will be gaps. Neither option works well. Sometimes, a small adjustment to a file is needed.
Taking time here prevents problems later. Proper sizing helps the extension look natural. It also makes the curing process easier because the tip sits flat against the nail.
3. Apply the Gel Adhesive and Cure Carefully
Apply a thin layer of adhesive gel on the natural nail. Do not overload it. A small amount inside the tip is enough. Place the tip starting from the cuticle area and press it toward the edge. Hold it firmly in place. Cure under the lamp while keeping pressure. This reduces air bubbles.
It is better to cure one nail at a time. Rushing can cause uneven placement. Slow and steady works best here.
4. Shape and Refine the Surface
Once all nails are cured, shape them according to preference. Square, almond, or coffin shapes are common choices. File gently to refine the edges. Lightly buff the surface if needed. Apply a base coat, then polish, and finally a top coat. Cure between each layer.
This final stage seals the extension and gives it shine. The nails should look smooth, balanced, and clean.
How Can a Gel X Nail Tutorial Help You?
A Gel X nail tutorial offers structured guidance. It shows each step clearly and in order. That makes a difference, especially for beginners.
1. Builds Confidence Before Starting
Seeing the process explained visually helps remove doubt. A Gel X nail tutorial shows the correct angle to place the tip and how much gel to use.
2. Helps Avoid Common Mistakes
Common mistakes include using too much adhesive or not curing long enough. A Gel X nail tutorial explains how to avoid these issues.
3. Improves Overall Finish
Watching proper shaping and polishing techniques improves final results. Over time, users notice better balance and smoother surfaces.
Top Pick: Top 2025 Summer Hair Trends You Need to Try This Season
Top 3 Ideas for the DIY Gel X Nails
You can check below to understand the top 3 ideas for the DIY gel X nails:
1. Soft Nude Finish for Daily Wear
A nude shade works well for office and daily routines. It looks clean without drawing too much attention. This style highlights the natural shape of the extension. It is simple, yet polished.
2. Classic French Tip Style
The French tip remains timeless. A neutral base with a clean white edge looks neat. It suits both short and long nails. And it rarely feels outdated.
3. Glossy Solid Colors
Single shades like red or pink give a confident look. A glossy top coat adds depth. This option works for events and casual days alike.
Things You Will Find in a Gel X Nail Kit
A Gel X nail kit contains the basic tools required for application. Knowing each item helps improve results.
1. Pre-Shaped Gel Tips
These tips come in different sizes and shapes. They are designed to fit various nail beds. Selecting the correct size improves comfort and durability.
2. Adhesive Gel
This gel bonds the tip to the natural nail. It hardens under a lamp. Applying a thin and even layer can prevent the overflow.
3. Nail File and Buffer
Files shape the nail after curing. Buffers smooth the surface before polishing. They help create a clean finish.
4. Curing Lamp
The lamp hardens the adhesive gel. Without proper curing, the tip will not stay secure. Consistent curing ensures strength.
5. Base and Top Coat
Base coat prepares the nail surface. Top coat seals and protects the color. Together, they increase durability and shine.
Tips to Choose the Right Apres Gel X Nails
Selecting the right Apres Gel X nails affects comfort and appearance. Several factors should be considered.
Choose the Shape Carefully
Different shapes create different impressions. Almond shapes elongate the fingers. Square shapes offer a bold look. Choose based on comfort and personal style.
Consider Everyday Length
Very long nails may feel uncomfortable during daily tasks. Moderate length is often more practical.
Check Flexibility
Flexible tips adjust better to the natural curve of the nail. Rigid tips may lift more easily.
Conclusion
Gel X nails at home offer a practical way to achieve clean and balanced nail extensions. With proper preparation, careful curing, and steady shaping, results can look professional and natural. Following structured steps and practicing regularly improves durability and overall finish.
Frequently Asked Questions
How long do these extensions usually last?
They can last up to three weeks when applied and maintained properly.
Is this method suitable for beginners?
Yes, beginners can follow step-by-step guidance and practice carefully.
Does removal harm natural nails?
Damage usually happens when removal is rushed. Gentle soaking protects the nails.
This content was created by AI